What Will You Need?
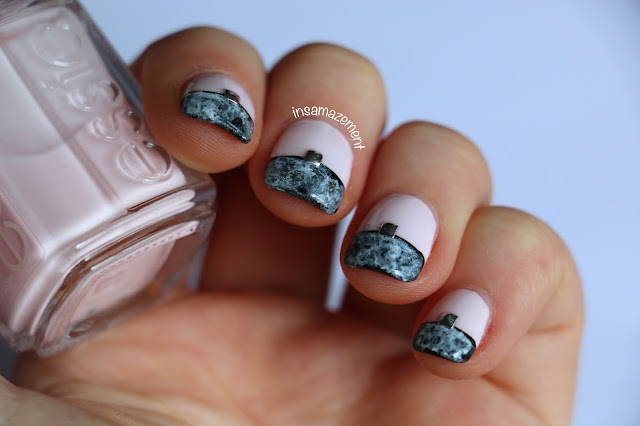
All you will need to create this look in a pale pink, white and black polish, a sponge, striping tape and some nail art gems.
The polishes I used were Essie 'Fiji' (pale pink), Illamasqua 'Boosh' (black) and Illamasqua 'Scorch' (white). The gems/studs are from the Avon nail art gem assortment wheel.
Step-By-Step Tutorial:
Step 1: Begin by painting all nails in a few coats of the pale pink shade and leave to dry completely. To speed up drying time get your hands on a quick dry top coat, I used Seche Vite.
Step 2: Taking a piece of striping tape, place this just below the centre of each nail.
Step 3: Paint the space below the striping tape in a coat of black polish. Once this is almost dry, take the white polish onto a sponge and carefully press this over the tip to create the marble effect.
Step 4: Remove the tape, paint a layer of top coat onto each nail and carefully place a gem/stud in the centre.
And there you have your marble mani!
What other trends have you spotted? Let me know in the comments below and I will try and create a nail art design to match!
Happy Nail Art-ing!
Sam x


No comments:
Post a Comment